やりたいこと:
- @wordpress/scriptsで開発環境を構築
- VSCodeでコード保存時にJS / SCSSの自動整形を行う
手順1 VSCode側の設定
まずはVSCode側の設定から。VSCodeに拡張機能 ESLint , stylelint-plusをインストールし有効化します。本記事の方法では、必要な拡張機能はこれだけ。PrettierのVSCode拡張機能は不要です。
次に、VSCodeで設定画面を開き、eslint format と検索してみましょう。設定画面は「左下の歯車 > 設定」で。Macの場合は command + , でも開けます。

ESLint: Enable にチェックを入れます。
自動修正はESLint と Prettierで行うので JavaScript > format: Enable のチェックは外しておきましょう。
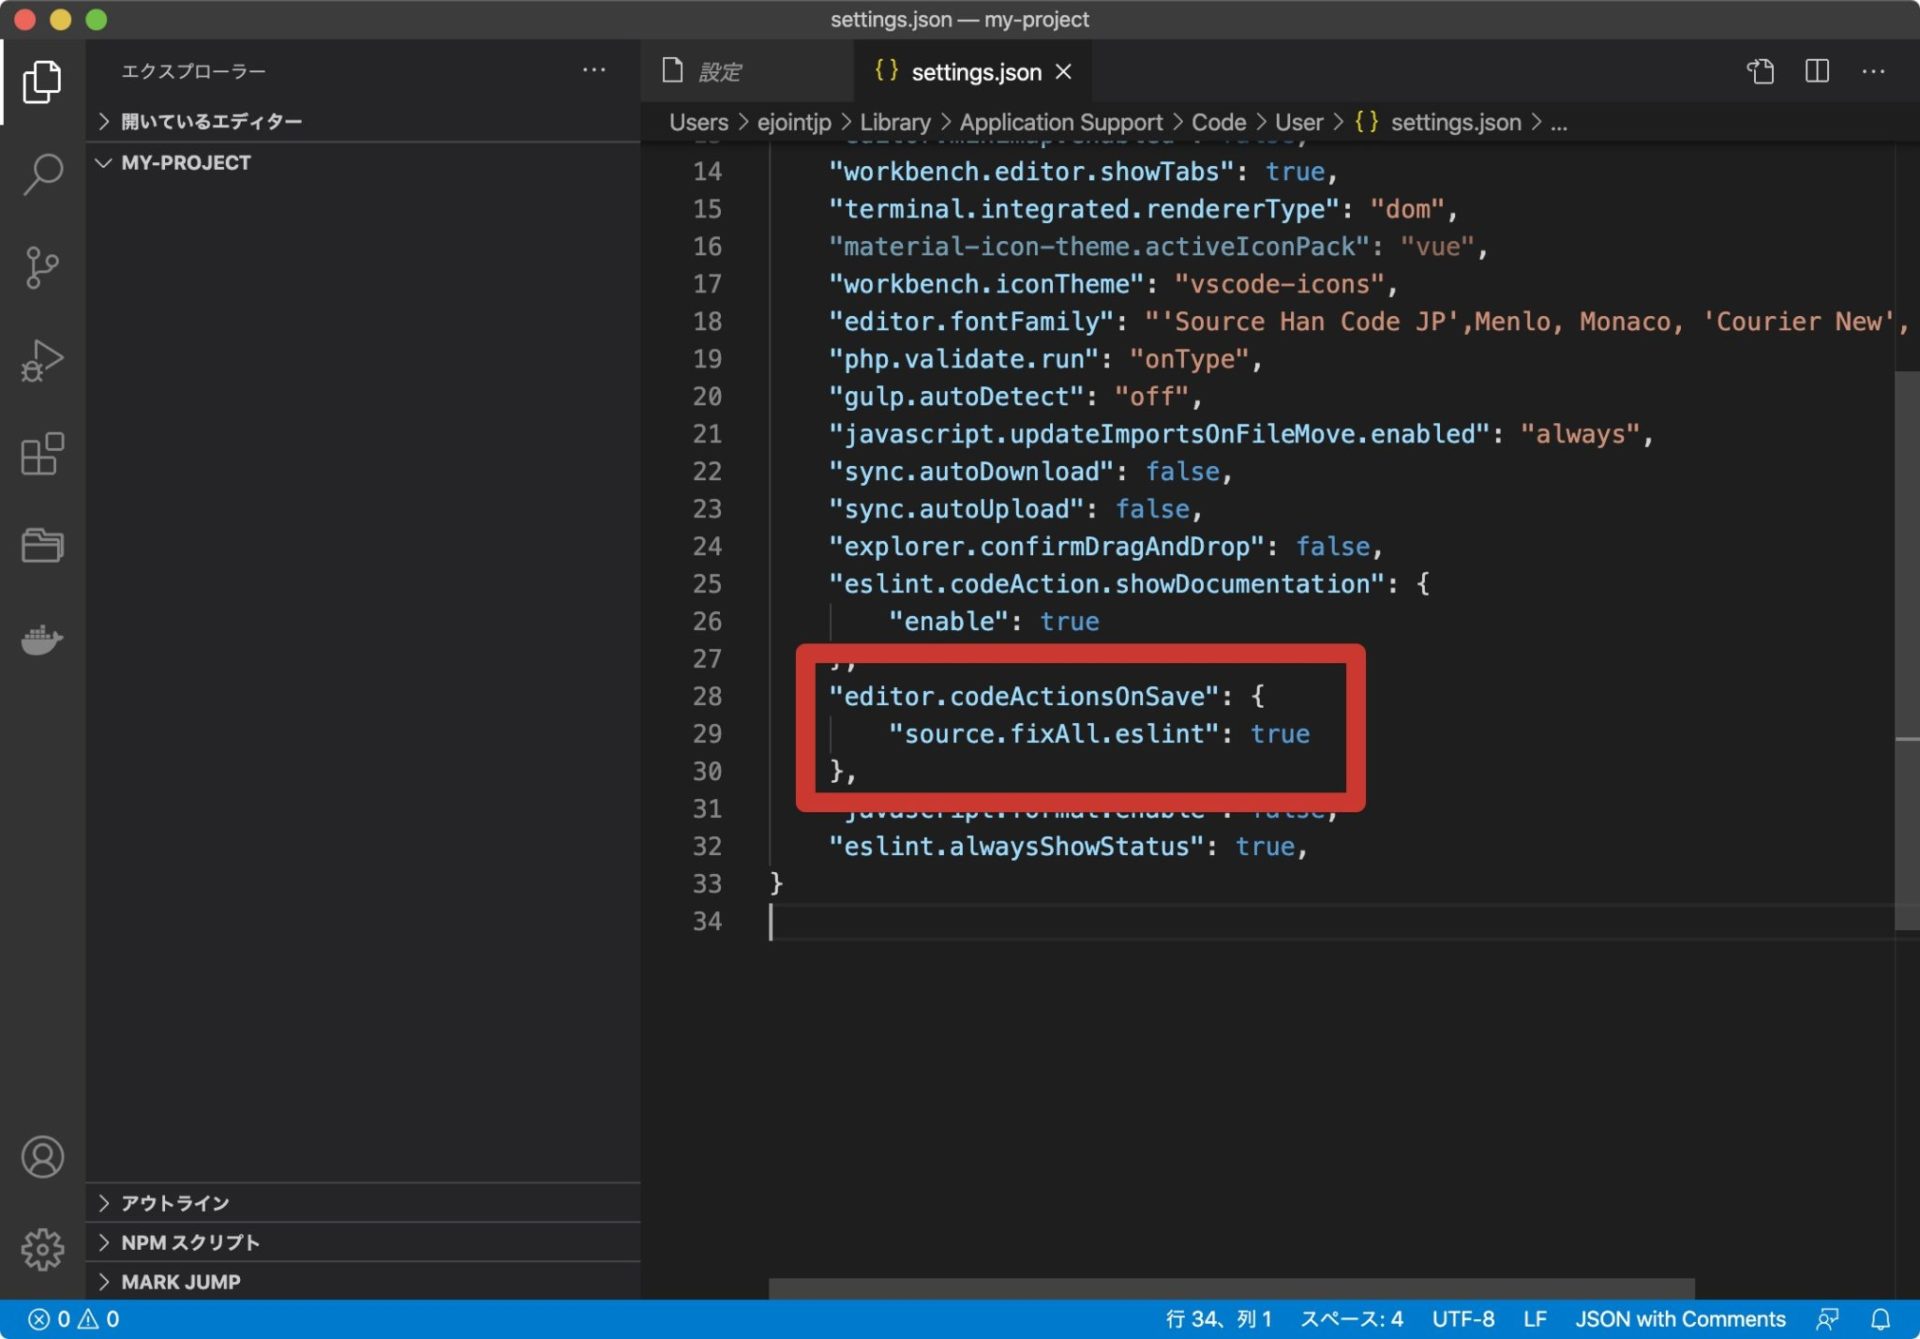
もうひとつ確認。設定ファイル .vscode/settings.json に以下の記述があるか確認しておきましょう。なければ追記しましょう。

"editor.codeActionsOnSave": {
  "source.fixAll.eslint": true
}
上記設定ファイルの開き方は、VSCodeの設定画面で下の画像のアイコンをクリック。

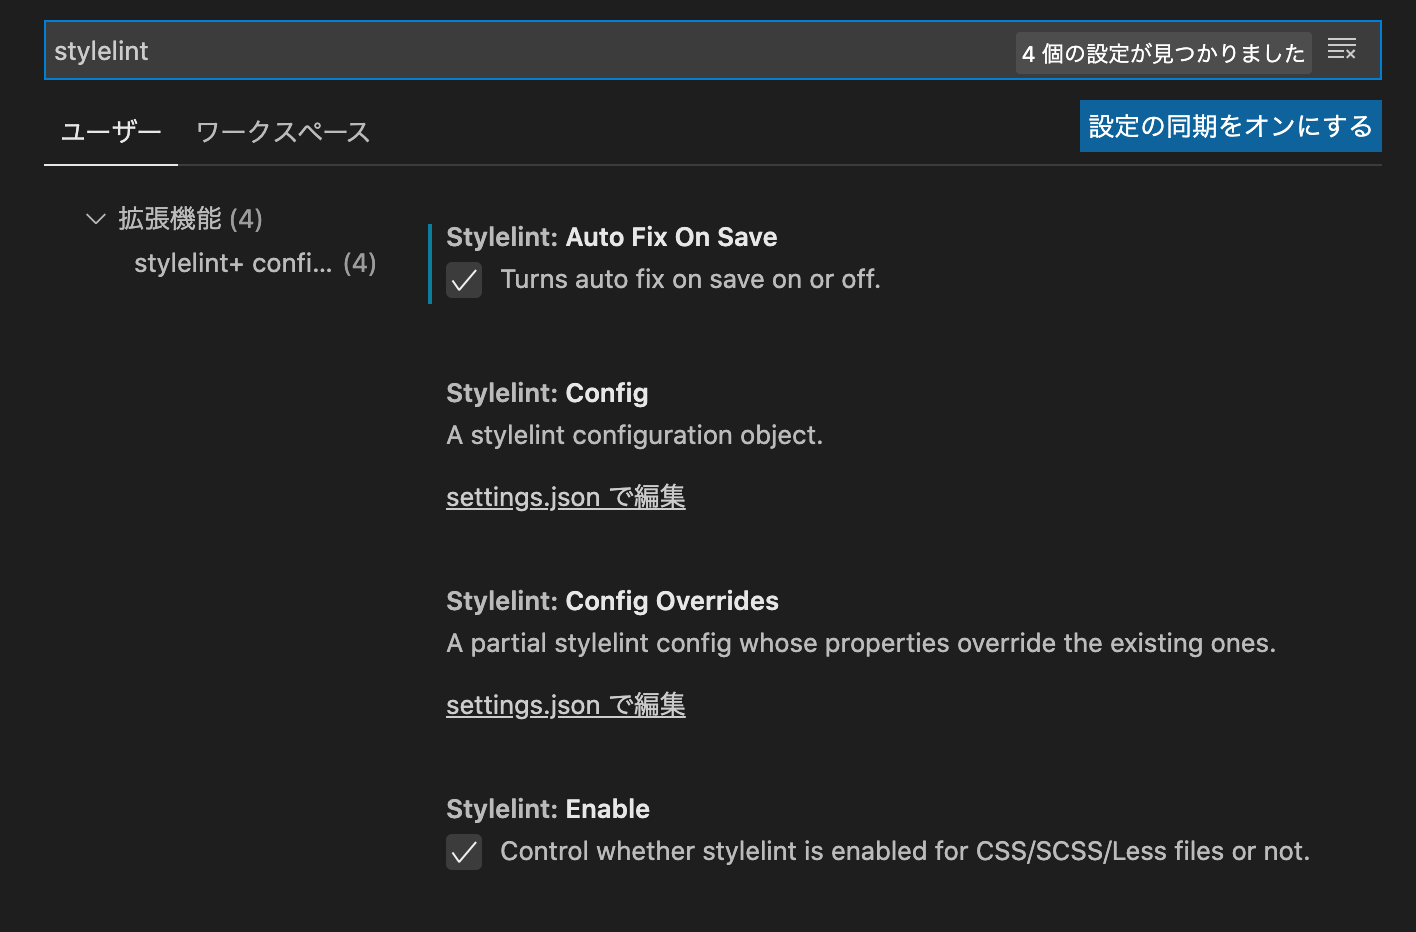
次はStylelintの設定。もう一度VSCodeで設定画面を開き、今度はstylelint と検索してみましょう。Stylelint: Auto Fix On Save にチェックを入れて有効にします。Stylelint にチェックが入っていることも確認しておきましょう。

VSCode側の設定は以上です。
手順2 @wordpress/scripts環境を作成
まずは任意の場所にプロジェクトを作成。
mkdir ~/path/to/my-project
cd ~/path/to/my-project
package.json を作成。ここでは npm initからの enter 連打で作成します。
npm init公式ドキュメントにしたがって、scriptsセクションにこんな感じでコマンドを記述しておきます。npm start npm run build などのコマンドが使えるようになります。
{
  "name": "my-project",
  "version": "1.0.0",
  "description": "",
  "main": "index.js",
  "scripts": {
    "build": "wp-scripts build",
    "check-engines": "wp-scripts check-engines",
    "check-licenses": "wp-scripts check-licenses",
    "format:js": "wp-scripts format-js",
    "lint:css": "wp-scripts lint-style",
    "lint:js": "wp-scripts lint-js",
    "lint:md:docs": "wp-scripts lint-md-docs",
    "lint:md:js": "wp-scripts lint-md-js",
    "lint:pkg-json": "wp-scripts lint-pkg-json",
    "packages-update": "wp-scripts packages-update",
    "start": "wp-scripts start",
    "test:e2e": "wp-scripts test-e2e",
    "test:unit": "wp-scripts test-unit-js"
  },
  // 略
}
手順3 プロジェクトにパッケージをインストール
以下のパッケージをインストールします。
- @wordpress/scripts
- stylelint
- stylelint-config-prettier: フォーマット関連のルールをすべてリセットすることでPrettier整形後にエラーを出さなくなる
- stylelint-config-property-sort-order-smacss: セレクタをソート
- stylelint-prettier: stylelint上でPrettierを動かすためのもの
yarn add -D @wordpress/scripts stylelint stylelint-config-prettier stylelint-config-property-sort-order-smacss stylelint-prettierstylelint-config-property-sort-order-smacss は、smacssという基準でソートしてくれるものです。他のソートにもできます。詳しくはこちらの記事をご覧ください。
手順4 必要な設定ファイルの作成
2つの設定ファイルを作ります。
- .eslintrc.js
- .stylelintrc.js
Prettierの設定は、@wordpres/scripts に組み込まれている@wordpress/eslint-plugin で設定されているようなので不要です。
また.eslintrc.jsがないとVSCodeの自動整形が動かないので置いておきます。WordPress推薦の設定を読み込んできます。ルール変更が必要なら適宜書きます。
module.exports = {
	extends: [ 'plugin:@wordpress/eslint-plugin/recommended' ],
	rules: {
    // 必要に応じてルールを記述
		'no-console': 'warn',
	},
};
.stylelintrc.js はこんな感じ。
module.exports = {
  extends: [
		'stylelint-config-wordpress/scss',
		'stylelint-config-property-sort-order-smacss',
  ],
	rules: {
    // 必要に応じてルールを記述
	},
};これで以上です。src/index.jsを作成し、コードが自動整形されるか試してみましょう。


